


The Complete Step By Step Guide to Changing Your Clock Mechanism
Author: Erin Crisci Date Posted:15 May 2021

D.I.Y Guide
Do you have a sentimental wall clock in your home that stopped moving many years ago and is now sitting there gathering dust? Or perhaps you’re making a new wall clock and you just don’t know where to start in order to choose the correct clock mechanism? Quite often, the process of diagnosing and repairing battery operated wall clocks is much easier than it seems, though at first it can seem quite daunting. Here at the Clock Shop we frequently receive phone calls from customers seeking assistance to identify what clock parts are required to fix broken battery operated wall clocks, as well as ordering replacement parts such as movements. This area has seen huge growth since the beginning of the Covid-19 pandemic as more and more people have taken up crafts and hobbies, as well as the boom of work from home jobs. Often the case is as simple as replacing an old battery, or replacing the clock movement which may have either outlived its lifespan or have become damaged or corroded in some way. To help streamline the process, we have created a step by step guide to diagnosing and fixing your battery operated wall clock.
Please note: If you're looking for a step-by-step guide with visual aids on how to replace your clock movement please check out our guide - Step-By-Step DIY Clock Movement Replacement Guide
What is a Battery Operated Wall Clock?
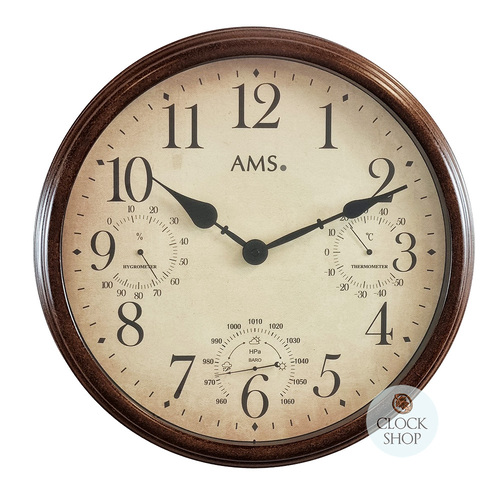
By definition, a battery operated wall clock is a clock that operates via a small black mechanism on the back of the clock, known as either a clock movement, mechanism or a motor. This mechanism helps to keep the time. The most common type of wall clock on the market is a quartz clock, which utilises a small quartz crystal/oscillator with electrical currents that maintains accurate time by pulsing every second. The mechanism (otherwise known as movement) in a quartz battery clock is much simpler than a traditional wind up clock, and their frequency is stable over a variety of temperatures, humidities and external conditions. For this reason, battery operated wall clocks keep very accurate time, as opposed to a wind up clock which may lose or gain minutes as due to external conditions such as fluctuations in temperature.
On average, a clock movement lasts for approximately 10 - 15 years, though often these movements can be faulty and need replacing much earlier than this. If the movement on your wall clock requires replacing, often the job is quite simple and only requires a new movement, some tools and a keen eye.
Below we have compiled a step by step DIY instruction manual to assist you in diagnosing and repairing any battery operated wall clock that may have stopped working, via a process of elimination.
Step 1. Replace the Clock Battery
If your battery wall clock has stopped working, the first step would be to try and replace the battery, which often could have simply lost its charge- make sure to replace the original battery using a high quality battery that will last a long time. We suggest you use an alkaline battery in your clock movements. The battery compartment will be found on the back of the clock, housed inside the movement. Remove your old battery and if necessary, clean the terminals- checking for any corrosion or battery acid that may have leaked inside the battery terminals, and cleaning with a damp q-tip or cotton ball, before drying thoroughly. Quite often, the internal clock mechanisms such as cogs, springs and clock movements are not affected, and simply replacing the battery is an easy fix. Most battery operated wall clocks require a single AA battery, unless it has a high torque movement (more on this later), in which it may require a C battery. If you have replaced the battery and your clock still does not work, proceed to step 2.
Step 2. Determine the correct movement for your clock
Determine if you need a standard movement or a high torque movement. This is based on the length of the minute hand. To measure this, measure from the central hole where the hands attach to the shaft, all the way to the tip. Whilst measuring the length of the clock hands, you need to identify their exact length as this in turn determines the movement required. If the minute hand is over 150-160mm in length (measuring from the centre to the very tip), it is best to use a high torque movement, which is geared differently than a standard movement. A high torque movement needs a movement that is capable of driving larger and heavier hands around the clock.
If your minute hand is under 150-160mm in length there are a range of different movements that could be suited to your clock with the most common two types of movements being a press fit, and a euro shaft movement. Also check to see if your clock hands tick or move continuously? If the hands tick, this is known as a step movement; whereas if the hands move continuously around the dial with no sound, this is referred to as a sweeping movement.
From here, take note of the hands of the clock. This will help you identify whether you have a press fit or a Euro Shaft movement. Your original clock hands will tell you a lot about what movement they fit on to. A brief outline of the two types of movements are listed below:
Press Fit Movement - In a press fit movement, the hands push on to the end of the shaft of the clock using friction. These hands will have an exact circular hole at the point where it attaches to the shaft or in some cases what looks like a hexagonal style hole to push onto the round shaft. The hour hand pushes on first followed by the minute hand.
Euro Shaft Movement (otherwise known as I shaft) - In euro shaft movement, the minute hand is held on with a nut. The hour hand will have a circular hole at the point where it pushes on to the shaft, whilst the minute hand looks slightly different - it has a slotted hole with 2 flat sides that have to line up with the same shape on the movement itself. It is very important to ensure you have selected the correct part. If you are unsure, the best solution is to purchase a complete kit including new hands with your replacement movement. Once you have determined which movement you require using the hands of your clock, move on to Step 3.
Step 3. Determine the shaft length you require
The shaft length correlates to thickness of the dial and the material that your movement is going through from behind the clock, through the dial and to the hands on the front. There are limited shaft lengths for high torque movements. In order to measure the shaft length, you need to remove the existing movement from the clock and measure the thread length as well as the overall shaft length. There is no one size fits all here. Measure the shaft length of your clock mechanism, all the way from where the shaft extends from the black movement body to the very tip of the entire shaft. It is important to note not to simply measure the brass threaded part as this is only one part of the entire shaft length, but rather to measure the entire length of the shaft. There are a number of different shaft lengths ranging between 7mm to 30mm. The shaft needs to fit through the dial of the clock, and the movement sits either underneath or behind the dial, with the shaft poking through the dial.
Step 4. Order Your Replacement Clock Parts
Order the correct parts for your particular battery operated wall clock using the information gathered from steps 1-4. In order to avoid additional shipping charges for incorrect items, it is important to ensure you have the correct specifications and information prior to placing an order. Usually these replacement parts are inexpensive.
If you have attempted steps 1-4 and still are not sure about the correct movement you require, you can post your old movement directly to the Clock Shop, who will identify the correct part for you and send an invoice for replacement. This is an inexpensive way to replace your clock movement, however it is often faster and easier to identify the mechanism yourself, as well as saving money on freight costs. An additional option would be to book your clock in with our onsite clockmaker Bruce Davis, who can also assist with such enquiries. Keep in mind that this step by step DIY process only works for battery operated wall clocks - if you own a cuckoo clock or a grandfather clock, these have an entirely different method of repairing broken parts, and are often more technical than battery operated wall clocks.
Step 5. Changing Your Clock Movement
Assuming the movement of the clock needed to be replaced, the old one will now have to be removed, keeping in mind that every clock is different. Generally you will have to unscrew the movement from the front of the dial, and remove the casing at the back. Identify if your clock has a glass lens that covers the dial. If it does, work out if you need to remove the bezel on the front to access the hands, or if your clock comes apart from the back. Sometimes the clock is held together with spring clips at the back and by removing these you can gain access to the hands. You will need to take note of the space between the dial and the lens / glass. If you order a movement and the shaft is too long the hands may touch the glass, and as such, the clock will not keep the correct time or stop altogether. You will need to be extra certain that you order the same shaft length.
5.a Changing a Press Fit Movement
The first step is to get the clock mechanism out of the frame- you need to be able to access the hands in order to release the movement. Generally, the second hand in a press fit movement will always just pull off and push on using friction, regardless of what type of shaft you have. If you have a hex nut then loosen with pliers then the movement will come free with the clock. Sometimes the movements will be housed in the back of the clock to stop them moving around. Check for any dust or build up in the movement itself, carefully cleaning if necessary. Replace the required movement back into the clock, fix with a hex nut (finger tight), then push the hands back on, ensuring the hands are all lined up at 12 o clock and parallel to each other, allowing a tiny bit of space (1mm) between the hands to ensure they do not touch each other as they spin around. Replace the battery and reset the time.
5.b Changing a Euro Shaft Movement
The first step is to get the clock mechanism out of the frame- you need to be able to access the hands in order to release the movement. Generally, the minute hand in a euro shaft movement will always be fixed on with a little nut. Unscrew this nut, and unscrew any collars keeping the movement in place, before removing the movement from the back of the clock. This may require a screwdriver to do so. It is important to note that if you have glass on the clock, you must adhere to the correct shaft length. Check for any dust or build up in the movement itself, carefully cleaning if necessary. From here, replace the movement and rescrew the original collar on to the new movement, before fitting it back through the clock. Then fit the hour hands first, ensuring to line them up with the 12 oclock position. The minute hand then needs to line up with the profile of the minute hand shaft, which will be friction fit. Once this is all placed, screw the nut back on and set the time.
5.c Some Tips For Changing A Clock Movement
Take note of exactly how you disassemble your clock, as you will need to reassemble it in the same way once you have replaced the movement. In some cases, your clock may have a housing that the mechanism clips into and therefore does not require any fixing from the front of the dial. There are some unusual cases where the movements are glued in and may require some careful tool work to remove the movement. Be careful not to damage the dial as you remove the movement.
Please note, there are other mechanisms that don’t have a threaded shaft. Generally these are either very short shafts and don’t require a hex nut to fasten the movement, or they use a different system to fix the movement to the dial. German made movements, such as UTS, HERMLE and JUNGHANS use a central fixing nut that screws from the front of the dial through to the movement behind the dial. These movements require a larger (10mm) hole in the dial and careful attention is required to choose the correct shaft length.
Summary
Hopefully by now you have diagnosed and repaired your battery operated wall clock, using our step by step instructional guide. If you require additional help, please don't hesitate to get in contact with our friendly staff at the Clock Shop who would be happy to assist.
Please also read our step by step instructional blog with pictures that guides you through each step, as well as a supplementary video as shown below.
.jpg)
Supplementary Video
Comments (11)
Advise Needed
By: Gav on 26 March 2024Great video and advise on changing a clock movement. I'm a novice but just about to have a go at restoring a big old Gensign double sided clock. Is it possible to run both sides using one high torque movement?
Clock Shop Response
Hi Gav, you would need a High Torque movement on both sides of the clock, one for each dial. Good luck with your project!
Great video!
By: Deb on 23 March 2024I have a Salvador Dali bronze melting clock that I love (25+ years old). It quit working and the battery wasn’t the issue. I bought a replacement melting clock, but it wasn’t nearly as nice. I finally googled to find out if I could fix it and came upon your wonderful website. I am ordering a standard movement with European shaft that I know will work after watching your video. Thank you from South Dakota, USA!
You’re a legend
By: Tracey McKenzie on 11 November 2023I watched the video twice, initially to understand what I needed to order. Your step by steps were so easy for even a total novice like me to understand. I felt comfortable enough to pull apart the movement, clean it, change battery and reassemble. To my amazement, the clock that was made for me by a friend now works and is (so far) keeping time. Thanks so much. I know if this movement fails, exactly what to order to make it right. And I love your shop up there. We visit whenever we holiday nearby.
Clock Shop Response
Thanks Tracey. We look forward to your next visit!
24 hour Seth Thomas Model 708-003 Quit running. Co
By: William Londree on 6 November 2023After learning that my clock was no longer made I wondered if I might fix it myself. New battery did not work. So surfing the net I finally found your site. I wanted to learn what was involved if I had to find a new movement. Your Tutorial was a great resource. I was not sure how to remove the case but decided to tweak the three inside tabs and it popped open easily. Now if I need a new movement I know to look up your website. I like that inexpensive old clock for my Ham Radio room and it might be worth fixing as well as several others in the house that have quit. Thanks for the excellent tips and resources. Bill W6SDI
Clock Shop Response
Glad we could help Bill!
What shaft length
By: Bob kay on 9 January 2023I am building my own clock, the timber i am using is 50mm thick. I know I will have to rebate the mechanism in the back, what is the best fit. It will be battery operated, and the distance between the centre and the numerals will be 90 mm
Clock Shop Response
Hi Bob, sounds like you have a great project ahead of you. Yes, I would certainly recommend rebating the movement in as far as possible. The longest shaft length we supply will suit 20mm thick (30mm rebate) however you could go further if you wanted. With hands approximately 90mm long you will only need a standard movement, not high torque. Good luck with the project.